The Art of Food Photography
Food photography is a unique genre that combines the art of photography with the deliciousness of food. It is a way to capture the beauty and essence of food, making it look so tempting that you can almost taste it through the screen. Whether you are a professional photographer or just a food enthusiast with a smartphone, this guide will help you take your food photography skills to the next level.
One of the most important aspects of food photography is lighting. The right lighting can make all the difference in how your food looks in photographs. Natural light is often the best choice for food photography, as it provides a soft and flattering glow. When shooting indoors, try to position your subject near a window or use a diffuser to soften the light. Avoid harsh overhead lighting or direct sunlight, as they can create unflattering shadows and highlights.
Composition is another key element in food photography. The way you arrange the food in the frame can greatly impact the overall aesthetic of the photograph. Consider the rule of thirds, a composition technique that divides the frame into a grid of nine equal parts. Place your main subject, such as a beautifully plated dish, along one of the imaginary lines or at one of the intersection points. This will create a visually pleasing composition that draws the viewer’s eye to the focal point.
Color is also an important aspect to consider in food photography. Vibrant and appetizing colors can make your food look more enticing. Think about the color wheel and how different colors can complement or contrast with each other. For example, pairing a vibrant red strawberry with a green mint leaf can create a visually appealing contrast. Additionally, consider the color of the background and props you use in your photographs. A neutral or complementary color can help make the food stand out and be the star of the image.
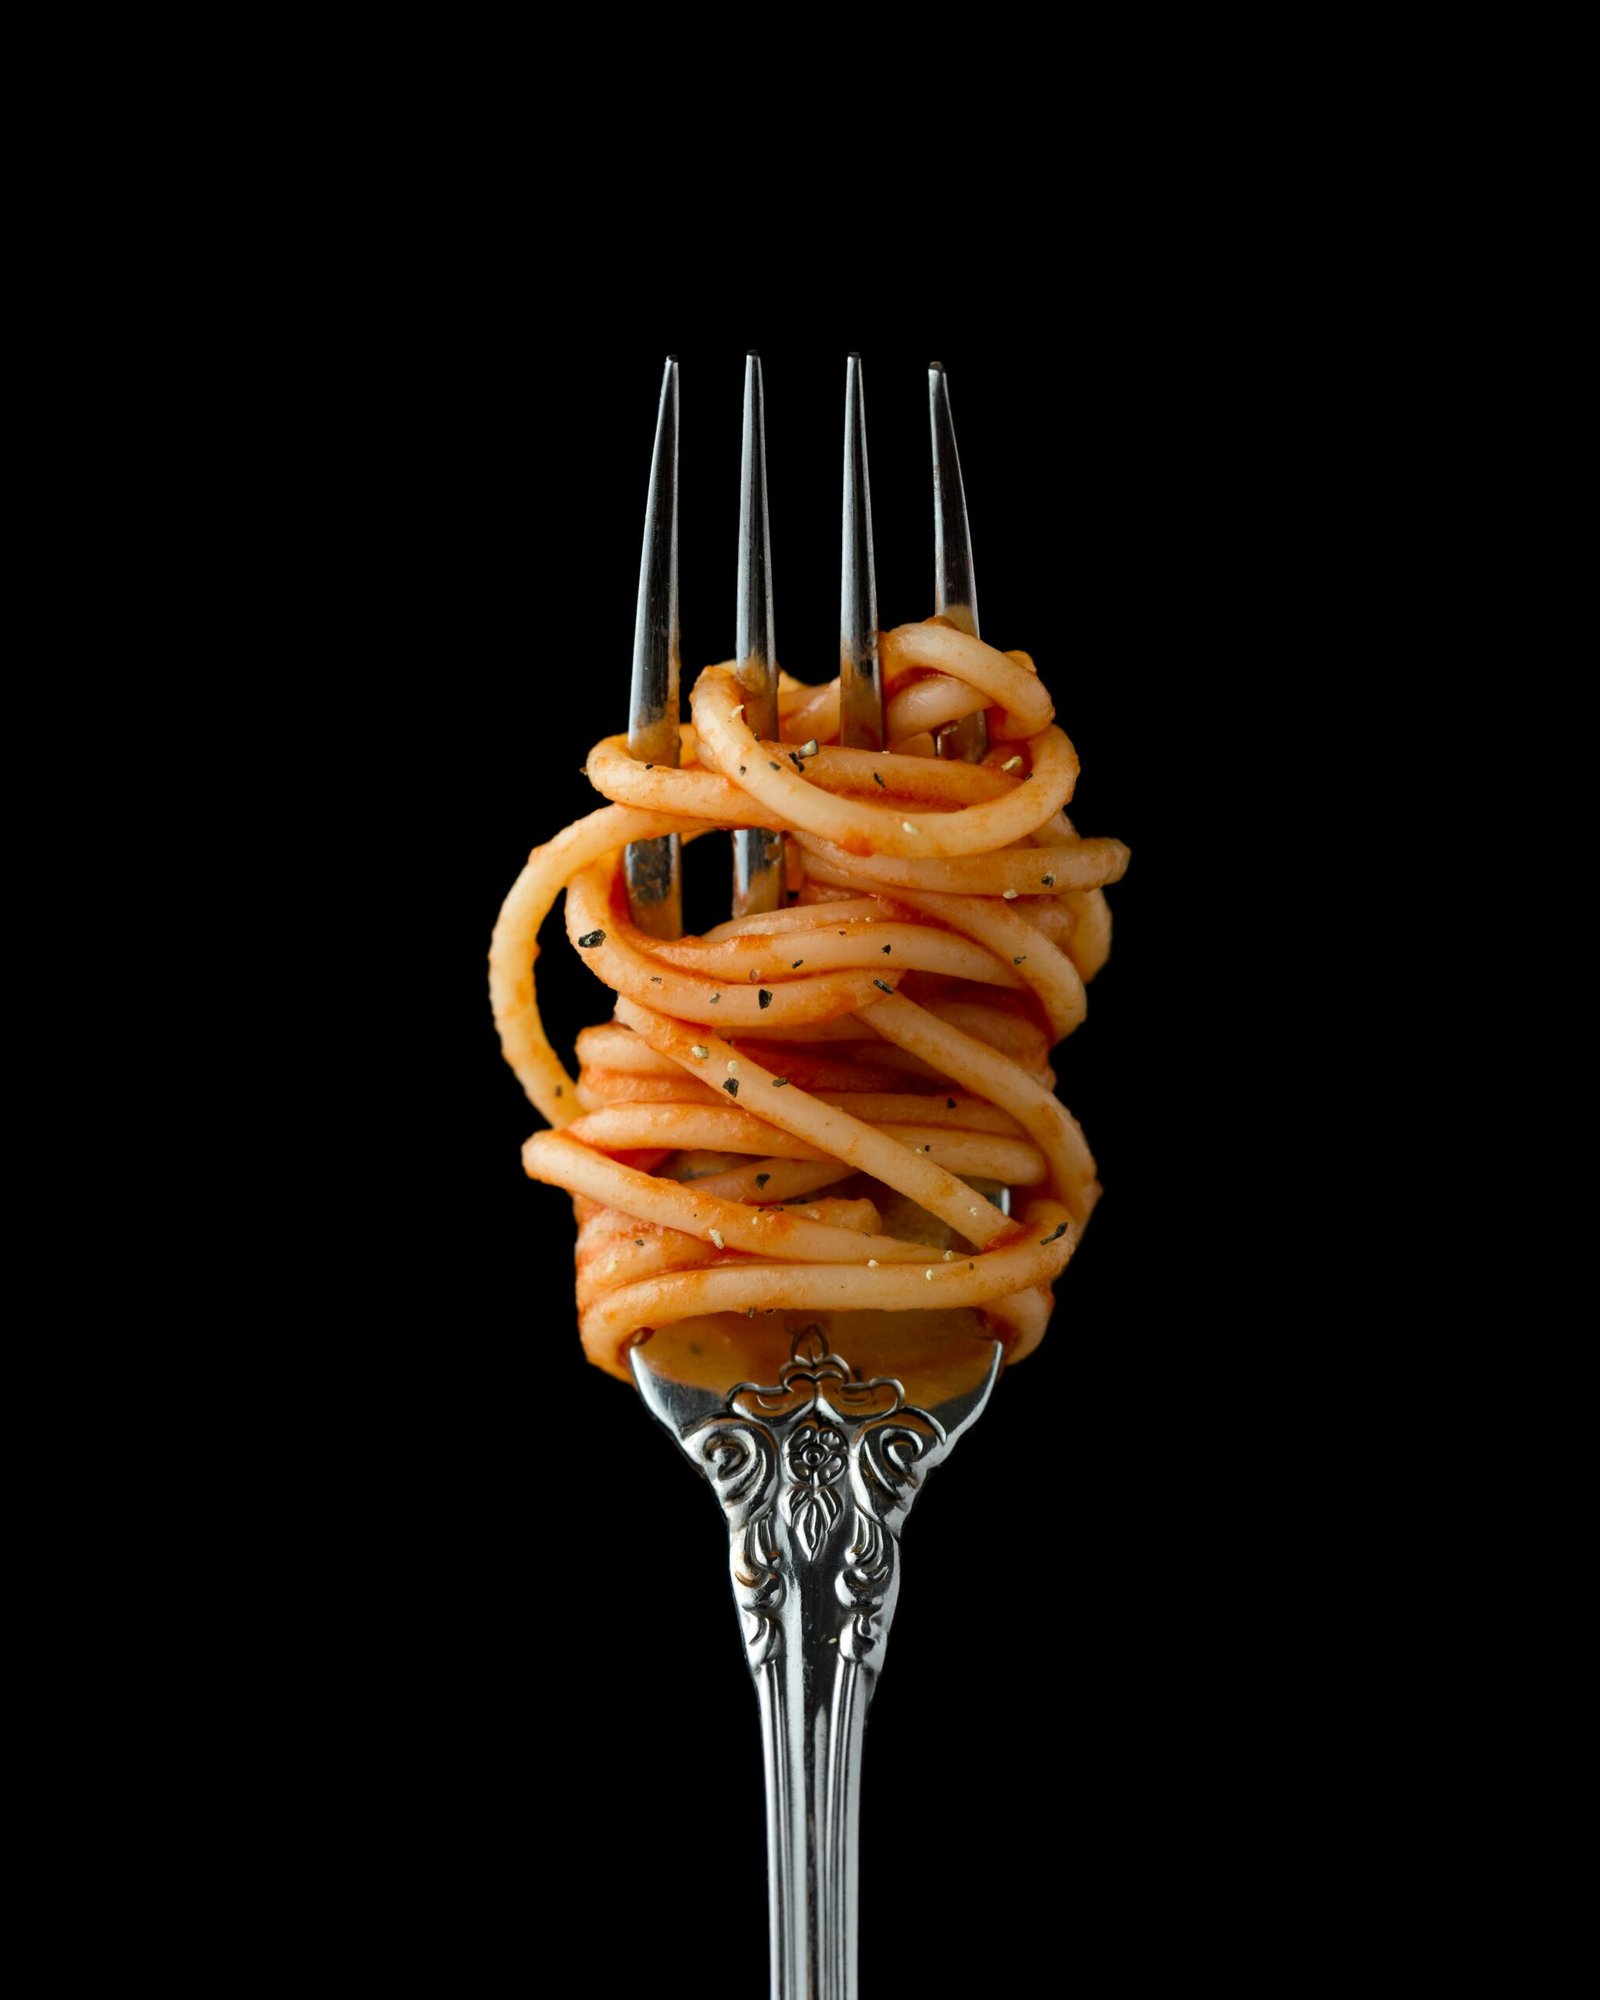
Texture is another element that can add visual interest to your food photographs. Highlight the textures of your subject by paying attention to details such as the crispy crust of a freshly baked bread or the gooey cheese oozing out of a burger. Use props like wooden cutting boards or textured fabrics to enhance the overall texture of the image. Experiment with different angles and perspectives to capture the food’s texture in the most appealing way.
Lastly, don’t forget about post-processing. Editing your photos can help enhance the colors, sharpness, and overall mood of the image. Use photo editing software or apps to adjust the exposure, contrast, and saturation of your photographs. Be careful not to overdo it, as excessive editing can make the food look unnatural. The goal is to enhance the natural beauty of the food, not to completely alter its appearance.
With these tips in mind, you are ready to embark on your food photography journey. Remember, practice makes perfect, so don’t be afraid to experiment and try new techniques. The more you practice, the better you will become at capturing the art and deliciousness of food through your photographs.
1. Lighting is Key
One of the most important aspects of food photography is lighting. Good lighting can make even the simplest dish look mouth-watering, while poor lighting can make the most delicious meal look unappetizing. Natural light is the best option for food photography, as it brings out the true colors and textures of the food.
When shooting indoors, try to position your subject near a window where there is plenty of natural light. Avoid using harsh overhead lights or direct sunlight, as they can create unflattering shadows. If you need to soften the light, you can use a white reflector or a diffuser to create a more even and pleasing light.
Another important consideration when it comes to lighting is the time of day. The quality and intensity of natural light can vary throughout the day, so it’s important to choose the right time to capture your food. In general, the best time for food photography is during the golden hours, which are the first hour after sunrise and the last hour before sunset. During these times, the light is softer and warmer, creating a beautiful and inviting atmosphere for your food.
In addition to natural light, artificial lighting can also be used effectively in food photography. Studio lights, such as strobes or continuous lights, can provide consistent and controllable lighting for your shots. These lights can be adjusted to create the desired mood and highlight the best features of your food. However, it’s important to be mindful of the color temperature of the artificial lights, as it can affect the overall look of your images. Using a color temperature meter or adjusting the white balance settings on your camera can help ensure accurate and pleasing colors in your food photographs.
When it comes to lighting, experimentation is key. Don’t be afraid to try different lighting setups and angles to find the one that works best for your specific dish. Pay attention to the shadows and highlights, and adjust your lighting accordingly. Remember, the goal is to make your food look as appetizing as possible, so take the time to get the lighting just right.
2. Composition and Styling
Composition and styling play a crucial role in food photography. The way you arrange the food and the props you use can greatly enhance the visual appeal of your photos. Here are a few tips to help you create stunning compositions:
- Choose the right background: A simple, clean background is often the best choice for food photography. A plain white or wooden surface can make the food stand out and be the star of the photo. However, depending on the style and theme you want to achieve, you can also experiment with different backgrounds. For example, a rustic, textured background can add a sense of warmth and authenticity to a shot of homemade comfort food.
- Add some props: Props can add interest and context to your food photos. Choose props that complement the food and help tell a story. For example, a rustic wooden cutting board can be the perfect prop for a homemade bread photo. Additionally, consider using props that add a sense of movement or action to the composition, such as a spoon mid-stir or a sprinkle of ingredients being added to the dish.
- Use the rule of thirds: The rule of thirds is a basic principle of photography composition. Imagine dividing your frame into a grid of nine equal parts, and position your main subject along the lines or at the intersections. This can create a more balanced and visually appealing composition. However, don’t be afraid to break the rules and experiment with different placements. Sometimes placing the subject in the center or using asymmetrical compositions can create unique and eye-catching images.
- Play with textures and colors: Experiment with different textures and colors to add visual interest to your photos. Consider using contrasting colors or incorporating elements with interesting textures, such as a sprinkle of herbs or a drizzle of sauce. Additionally, think about the overall color palette of your composition and how it can enhance the mood or theme of the dish. For example, using vibrant, fresh colors for a summer salad or earthy, warm tones for a cozy winter soup.
By paying attention to composition and styling, you can elevate your food photography from ordinary to extraordinary. Remember to experiment, trust your creative instincts, and have fun capturing the beauty and deliciousness of food through your lens.
3. Props and Equipment
While you can create beautiful food photos with just a smartphone, having the right props and equipment can take your photography to the next level. Here are a few essential items that every food photographer should have:
- Camera: While smartphones can produce great results, a DSLR or mirrorless camera will give you more control over your settings and allow you to capture higher quality images. With a camera, you can adjust the aperture, shutter speed, and ISO to achieve the desired depth of field, motion blur, and overall exposure. Additionally, the larger sensor size and interchangeable lenses of a dedicated camera will provide better image quality and versatility compared to a smartphone.
- Macro lens: A macro lens is perfect for capturing the intricate details of food, such as the texture of a strawberry or the crumbs on a freshly baked cookie. This specialized lens allows you to focus at a close distance, enabling you to highlight the small details that make food visually appealing. Whether you’re shooting close-ups of ingredients or capturing the fine details of a plated dish, a macro lens will elevate the quality of your food photography.
- Tripod: A tripod is essential for keeping your camera steady and ensuring sharp images, especially when shooting in low light conditions or using longer exposure times. By stabilizing your camera, a tripod eliminates the risk of camera shake, resulting in crisp and clear photos. It also allows you to experiment with different compositions and angles without worrying about holding the camera steady. Look for a sturdy tripod with adjustable legs and a reliable head that can support the weight of your camera and lens.
- Props: Build a collection of props that suit your style and the type of food you photograph. This can include plates, bowls, utensils, napkins, and other decorative items. Props play a crucial role in setting the mood and enhancing the visual appeal of your food photography. They can help create a cohesive theme, add texture and depth, and complement the colors and textures of the food. Experiment with different props to find the ones that best showcase your culinary creations.
- Reflectors and diffusers: These tools can help you control and manipulate light, allowing you to create the desired mood and eliminate harsh shadows. Reflectors bounce light onto the subject, filling in shadows and adding a soft, flattering glow. They come in various shapes and sizes, such as white, silver, and gold, each producing a different effect. Diffusers, on the other hand, soften harsh light by spreading it evenly and reducing contrast. They are particularly useful when shooting in direct sunlight or using artificial lighting setups. By using reflectors and diffusers strategically, you can achieve a well-balanced and professional-looking lighting setup for your food photography.
Once you have chosen the right software and adjusted the exposure and colors, there are a few more editing techniques you can use to enhance your food photos. One of these techniques is sharpening. Sharpening can help bring out the details and textures of the food, making it appear more appetizing. However, it’s important to use sharpening sparingly and carefully, as too much sharpening can result in a harsh and unnatural look.
Another important aspect of editing food photos is white balance. White balance refers to the color temperature of the photo, and it can greatly affect the overall look and feel of the image. You can adjust the white balance to make the photo appear warmer or cooler, depending on the desired effect. For example, if you want to give your food photo a cozy and warm feel, you can adjust the white balance to make it appear slightly more yellow or orange.
Furthermore, you can also experiment with different filters and presets to give your food photos a unique and creative look. Many photo editing software programs offer a wide range of filters and presets that can instantly transform the mood and atmosphere of your images. Whether you prefer a vintage, moody, or bright and airy look, there are filters and presets available to suit your style.
Lastly, don’t forget about the importance of post-processing. Post-processing involves fine-tuning your edited photos to ensure they are ready for sharing or printing. This can include adjusting the levels, curves, and sharpness, as well as applying any final touches or refinements.
Overall, editing and post-processing are crucial steps in the food photography process. They allow you to take your already great food photos and make them even more stunning and captivating. With the right software, techniques, and attention to detail, you can create mouthwatering images that will leave your viewers hungry for more.
5. Tell a Story
Food photography is not just about capturing a beautiful image of a dish; it is also about telling a story. Whether you are photographing a homemade meal, a restaurant dish, or a food product, think about the story you want to convey through your photos.
Consider the context, the ingredients, and the emotions associated with the food. Is it a cozy family dinner? A vibrant street food experience? A luxurious dining experience? Use props, backgrounds, and styling to evoke the desired mood and create a narrative that engages the viewer.
For example, if you are photographing a homemade meal, you might want to create a warm and inviting atmosphere. You could use a rustic wooden table as a background, place some fresh ingredients around the dish, and add a cozy blanket or a cup of hot tea in the frame. This would give the viewer a sense of comfort and homey feeling, making them imagine themselves sitting at the table and enjoying the meal.
On the other hand, if you are photographing a street food experience, you might want to capture the vibrant and bustling atmosphere of the street. You could use colorful props like food carts, street signs, and busy people in the background to create a sense of energy and excitement. Adding some motion blur to the image could also convey the fast-paced nature of street food.
When photographing a luxurious dining experience, you might want to create an elegant and sophisticated ambiance. You could use a glamorous table setting with fine china and silverware, and add some soft lighting to enhance the mood. Including a glass of champagne or a bottle of expensive wine in the frame could also convey the idea of indulgence and luxury.
By carefully considering the story you want to tell and using the right props and styling, you can create food photos that not only look beautiful but also engage the viewer and make them feel a connection to the food and the experience it represents.
